When you see the “No Atomizer” error on your vape mod, it’s clear that something’s not right. This common issue prevents your device from detecting the atomizer (coil), making it impossible to vape. But what does this message mean, and how can you fix it quickly? Here’s a step-by-step guide to help you understand and resolve the problem.
What Does “No Atomizer” Mean?
The “No Atomizer” message typically appears when your mod fails to recognize the coil in the tank. This can happen for various reasons, such as poor connection, a malfunctioning coil, or internal issues with the mod itself. When this error occurs, your vape device won’t fire, meaning it can’t produce vapor. Understanding the root cause of the problem is the first step in resolving it.
Common Causes of the “No Atomizer” Error
Several factors can trigger the “No Atomizer” error, each with a straightforward solution. Let’s take a closer look at the most common causes:
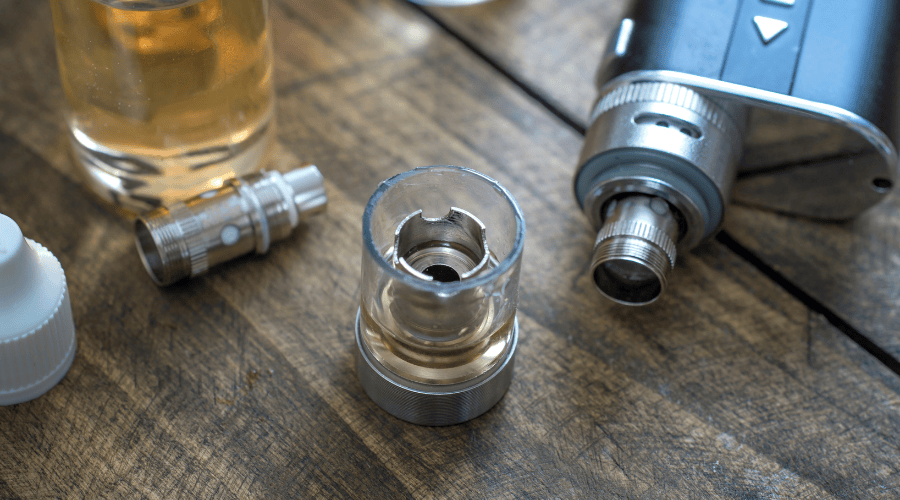
1. Dirty 510 Connections
The 510 connection is the metal threading that connects your tank to your mod. Over time, dust, e-liquid, or grime can accumulate on these contact points, blocking the connection between the tank and mod. This can prevent the mod from detecting the atomizer.
2. Faulty or Improperly Installed Coils
If your coil is installed incorrectly or has become damaged, it can fail to make a proper connection. A coil that is cross-threaded or not screwed in tightly enough will trigger the error. Additionally, if the coil has seen better days, it may no longer work effectively.
3. Leaked E-Liquid
Sometimes e-liquid can leak from the tank, seeping into the mod’s internals. This can cause short circuits or damage the mod’s internal components, preventing it from recognizing the atomizer.
4. Device Malfunctions
In rare cases, the issue could be with the mod’s internal electronics. If the chipset or wiring is malfunctioning, the mod might not be able to detect the atomizer, no matter what you try.

How to Fix the “No Atomizer” Error
Now that you know the common causes of the error, let’s dive into how to fix it. Follow these simple steps to get your device working again.
Step 1: Clean the 510 Connections
A dirty 510 connection is one of the most common culprits behind the “No Atomizer” error. Here’s how to clean it:
Why It’s Important: Dirt and residue on the connection points can block the signal between the tank and the mod.
How to Do It: Use a cotton swab lightly dampened with rubbing alcohol to clean both the 510 connection on the tank and the mod. Be gentle to avoid damaging the connection. Once cleaned, let it dry completely before reassembling the device.
Pro Tip:
If you vape in a dusty environment or your device has been used frequently, make cleaning your mod a regular part of your maintenance routine.
Step 2: Check and Reinstall the Coil
An improperly installed coil is another major cause of the “No Atomizer” error. Follow these steps to ensure the coil is properly installed:
Installation Check: Unscrew the coil from the tank and check for any damage. Look for signs of wear or corrosion that might prevent the coil from working properly.
Reinstallation: When reinstalling the coil, make sure it’s screwed in tightly, but don’t overdo it. The coil should be snug without being cross-threaded. If the coil is damaged, replace it with a new one.
What to Look For:
Check for any bent pins, discoloration, or burnt parts on the coil. If you see any damage, it’s time to replace the coil with a fresh one.
Step 3: Inspect for E-Liquid Leaks
E-liquid leaks can cause serious issues with your mod, including short circuits that make it impossible for the device to detect the atomizer. To fix this:
Inspect the Tank: Look for any signs of leaks around the base of the tank or on the mod itself. If you see liquid pooling around the 510 connection, it’s likely that the tank has a leak.
Clean It Up: Use a paper towel or cloth to clean up any e-liquid. Make sure the tank is sealed properly and that the coil is inserted tightly to prevent further leaks.
Prevention Tips:
Ensure that the tank is properly sealed and that you’re not overfilling it. Keep the tank upright and avoid leaving it in hot environments where the liquid could expand and leak.

Step 4: Test with Another Tank or Mod
If the above steps don’t resolve the issue, you may need to test the tank with another mod, or vice versa. This helps isolate the problem:
Swapping Tanks: If you have another working tank, try it on your mod. If the error goes away, then the issue is with the original tank.
Test the Mod: If you have another mod, try using the original tank on that mod. If the error persists, it may be an issue with the mod itself.
Testing with different parts can help you pinpoint whether the issue lies with the mod, tank, or coil.
Step 5: Replace the Device If Necessary
If none of the previous steps resolve the issue, it might be time to consider replacing the mod. In some cases, internal malfunctions or wiring issues can cause the device to stop recognizing the atomizer. Here’s what you can do:
Check Warranty: If your mod is still under warranty, contact the manufacturer for a replacement or repair.
Consider a New Mod: If the warranty has expired or repairs are too costly, it might be time to invest in a new mod.
Preventing Future “No Atomizer” Issues
To avoid encountering the “No Atomizer” error again in the future, follow these preventive tips:
Regular Maintenance Tips
Clean the Connections: Make it a habit to clean the 510 connections regularly to prevent grime buildup.
Replace the Coil: Coils can wear out over time, so make sure to replace them when they begin to show signs of damage or wear.
Choosing the Right Coil and Tank
Compatibility Is Key: Always check that your tank and coil are compatible with your mod. Using the wrong coil can lead to a poor connection or failure to detect the atomizer.
Invest in Quality: Don’t skimp on coils and tanks. Opt for reputable brands to ensure that your vaping experience is smooth and hassle-free.

When to Seek Professional Help
If you’ve tried all the troubleshooting steps and the error persists, it might be time to seek professional help. Here’s when to reach out:
Professional Diagnosis
Sometimes, the problem might be more complex than a simple cleaning or coil replacement. Visiting a vape shop can help you get a diagnosis from an expert.
Manufacturer Support
If your device is under warranty, don’t hesitate to contact the manufacturer for assistance. They may offer a replacement or repair option.
Conclusion
The “No Atomizer” error can be frustrating, but it’s often easy to fix once you understand the cause. By following the steps above, you can troubleshoot the issue and get your device back in working order. Regular maintenance and proper care will also help prevent future issues, ensuring that your vaping experience remains smooth. If the problem persists, don’t hesitate to seek professional help to get your device back to peak performance.
If you're looking to purchase a new vape or related accessories, feel free to visit our vape online store for a wide selection of high-quality products to enhance your vaping experience.
